
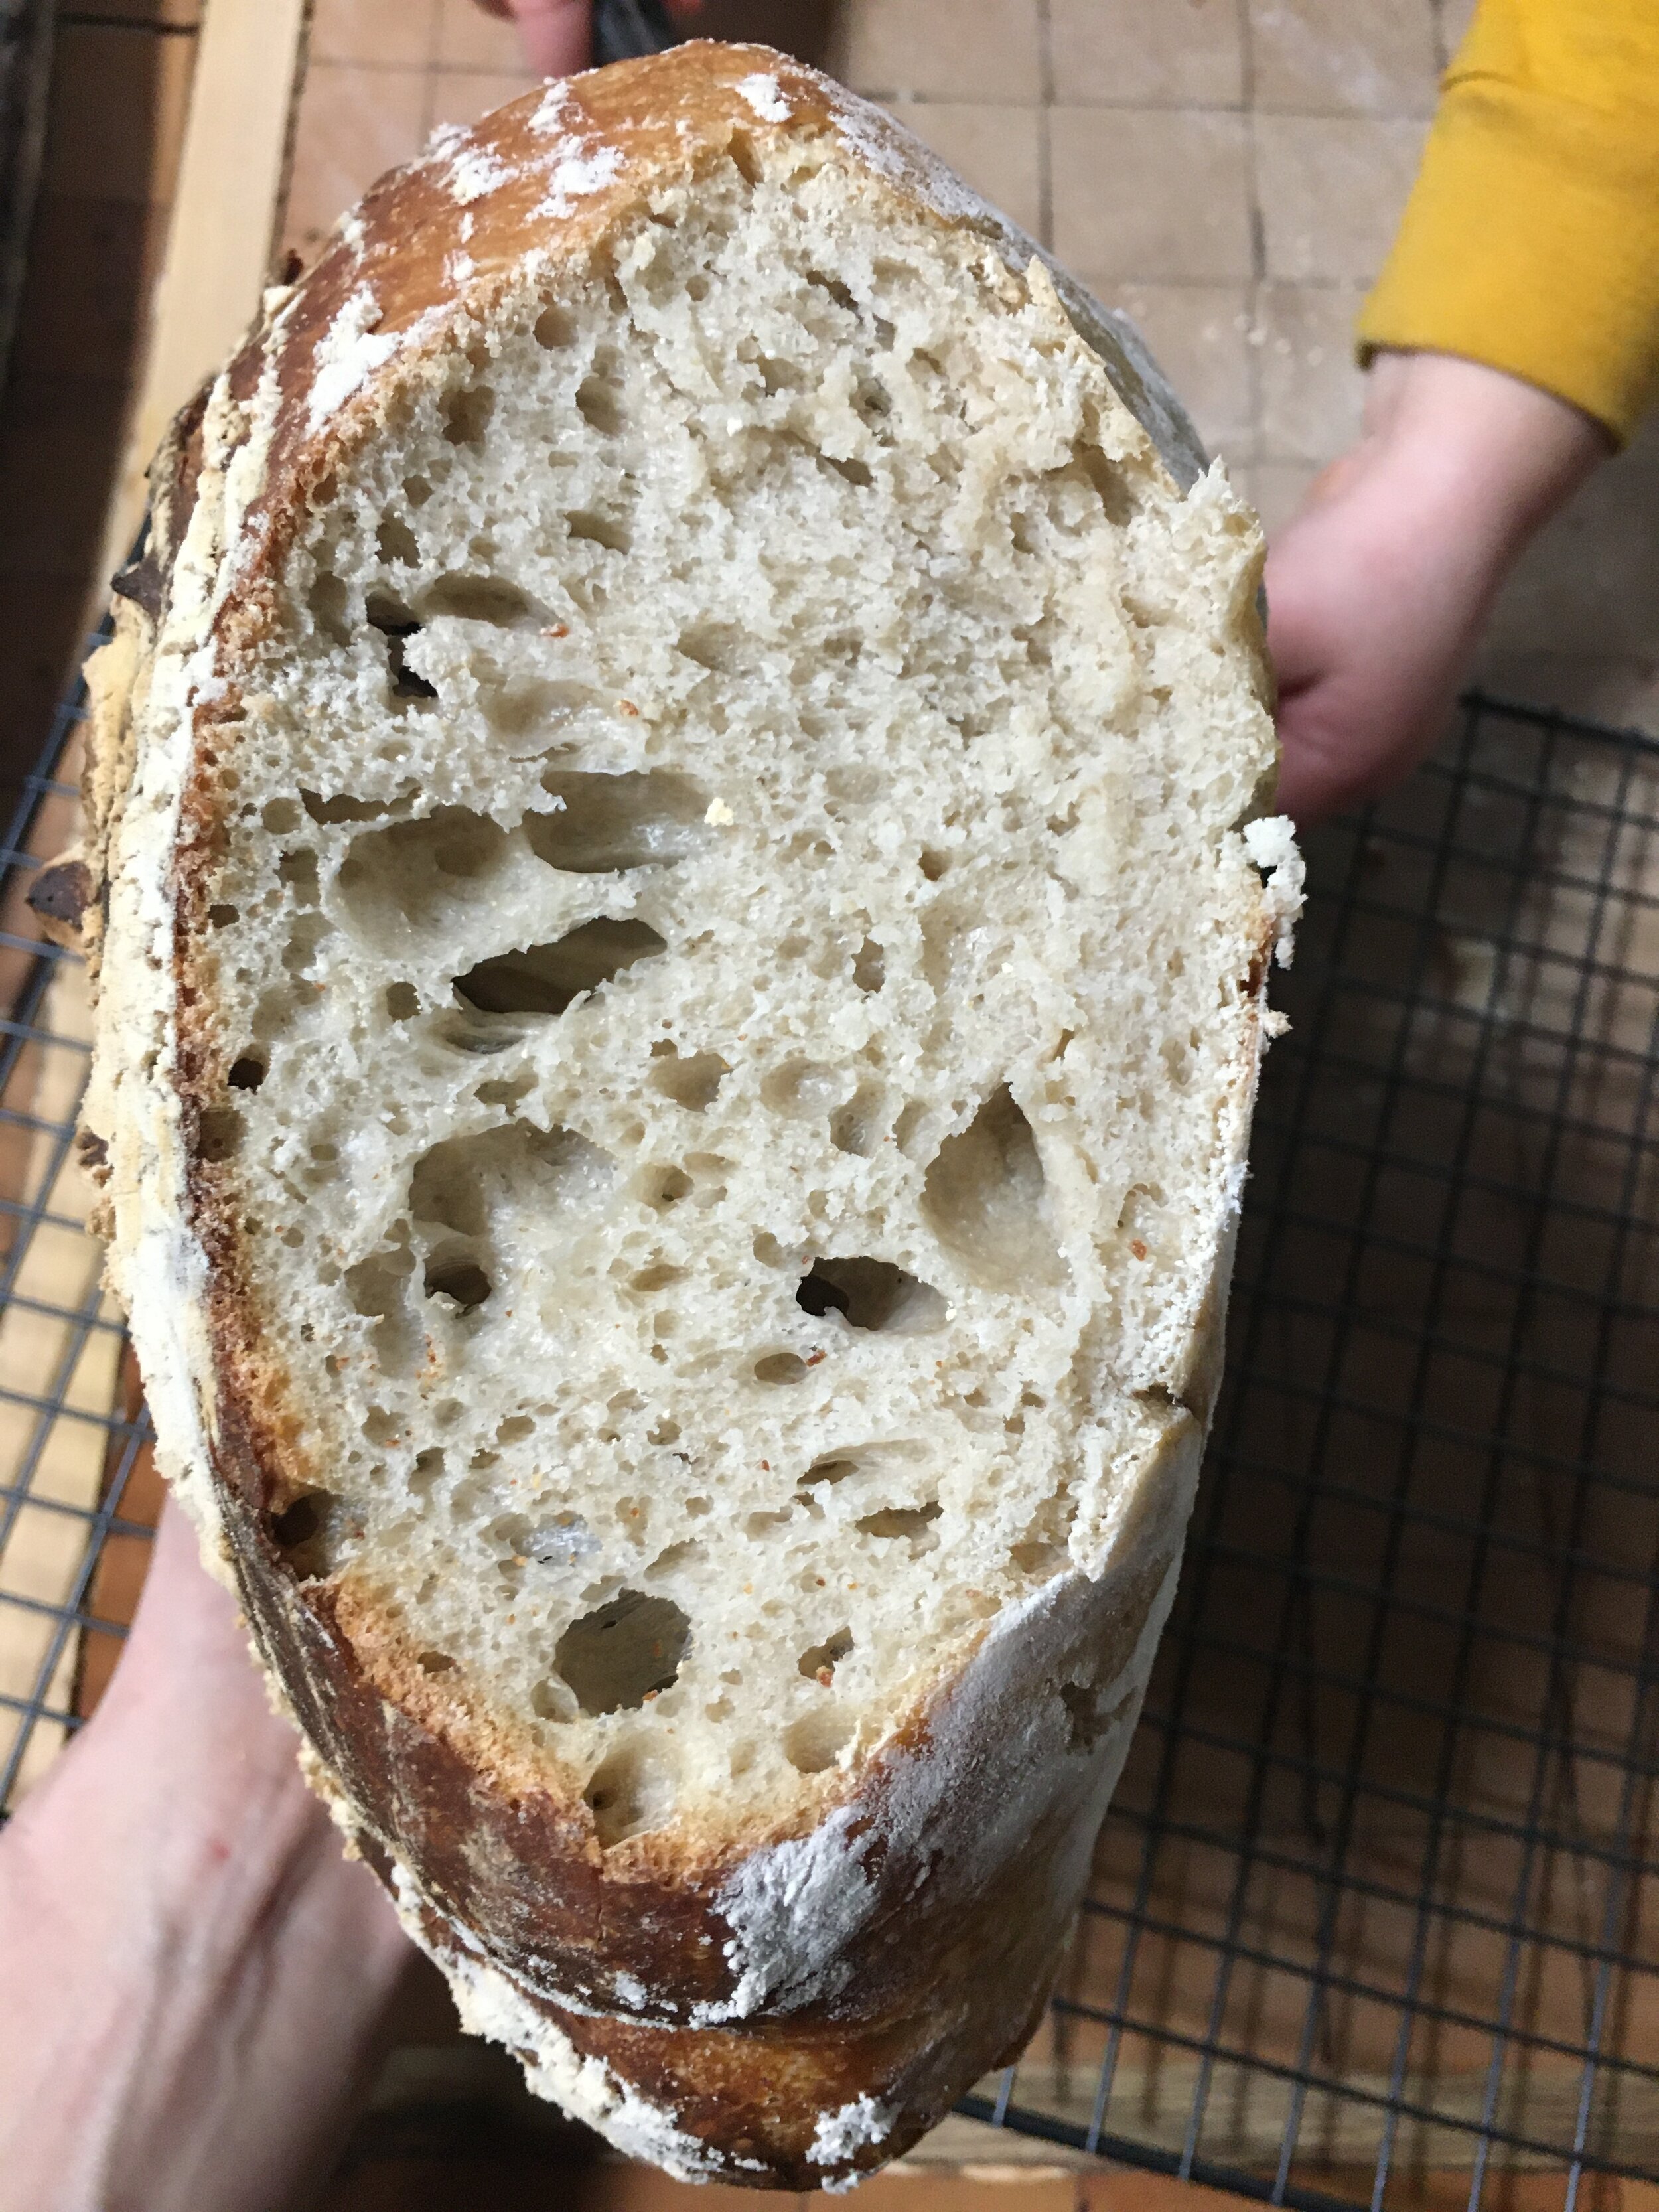
How I'm Making Holey Sourdough Bread
I went completely gluten-free to heal my gut during Lyme treatment many years ago and have since been able to include gluten in my life with a little more regularity. Not the Wonder Bread kind, but the well-fermented, more digestible kind found in a naturally-fermented sourdough, especially one made with einkorn flour (an ancient form of wheat not hybridized to have higher gluten content).
With a preference for cooking spontaneously and not following recipes, I previously thought I wouldn't be very good at baking bread. But after seeing how many newbies were having success with it through Laura Bruner's #sourdoughsisterhood IG shares, I was finally inspired to give it a try.
Disclaimer: I am not a bread expert, I’m just sharing what’s working for me. Also, I’m not recommending those with true gluten intolerance or Celiac disease to have sourdough bread.
My first batch failed miserably... because I was using 3 different sets of directions and all of them varied widely.
But failure always leads to seeking improvement so I researched "how do I get holes in my sourdough?" and was quite successful my second time around! It tastes delicious, it's super filling (of course, a generous topping of butter, mayo, or avocado helps) and it's quite digestible!
Holey Sourdough Bread
Ingredients
500g flour (organic and/or einkorn preferred)
325 ml room temperature filtered water
5g sea salt
150g sourdough starter (scroll down for how I made mine or buy a starter here)
Equipment
Mixing bowl
Preparation
I start this process in the early evening (between 3-5 pm) the day before I want fresh bread.
Mix water and starter in a medium mixing bowl.
Add the flour and mix with clean hands until it forms a “shaggy ball” (thanks for the descriptive term, Laura ;) ) and allow to leaven for 30 min to 1 hour.
Sprinkle the salt while stretching and folding the dough. (I loved this video for how to stretch and fold.)
Stretch and fold the dough every hour for 4 hours (covering it with a towel when it’s fermenting), wetting hands before each time to prevent sticking. To do this, pinch the dough, stretch it and pull across to the other side of the dough-ball (adding a little water to your hands if the dough breaks/doesn’t stretch well). Continue stretching and folding until you’ve complete one rotation.
Sprinkle a proving basket with some flour (gluten-free if you’re pretty sensitive to unfermented wheat) and place the dough ball into the basket, smooth side down (folded parts on top). Cover with towel or linen and let sit overnight to ferment and rise.
In the morning (around 6 or 7 am), place an empty baking sheet in the oven and preheat the oven at 445 degrees F.
Boil a kettle of water for pouring into the empty baking sheet.
While the oven is heating up, uncover your proving basket and flip the dough gently onto a baking sheet, stretched-and-folded side down.
Score the dough about 2 cm deep on each side with a lame or sharp knife (your “baker’s signature”)
Once the oven has reached 445F, place the sheet with the dough on the top rack and pour your boiling water (about 1 cup) into the empty sheet on the bottom rack.
Set your timer for 25 minutes and bake. Your loaf should sound hollow on the bottom when you tap it.
Place your loaf on a rack and let it cool for 1 hour (this is hard, so if you can’t wait an hour, wait at least 30 minutes, it’s worth it).
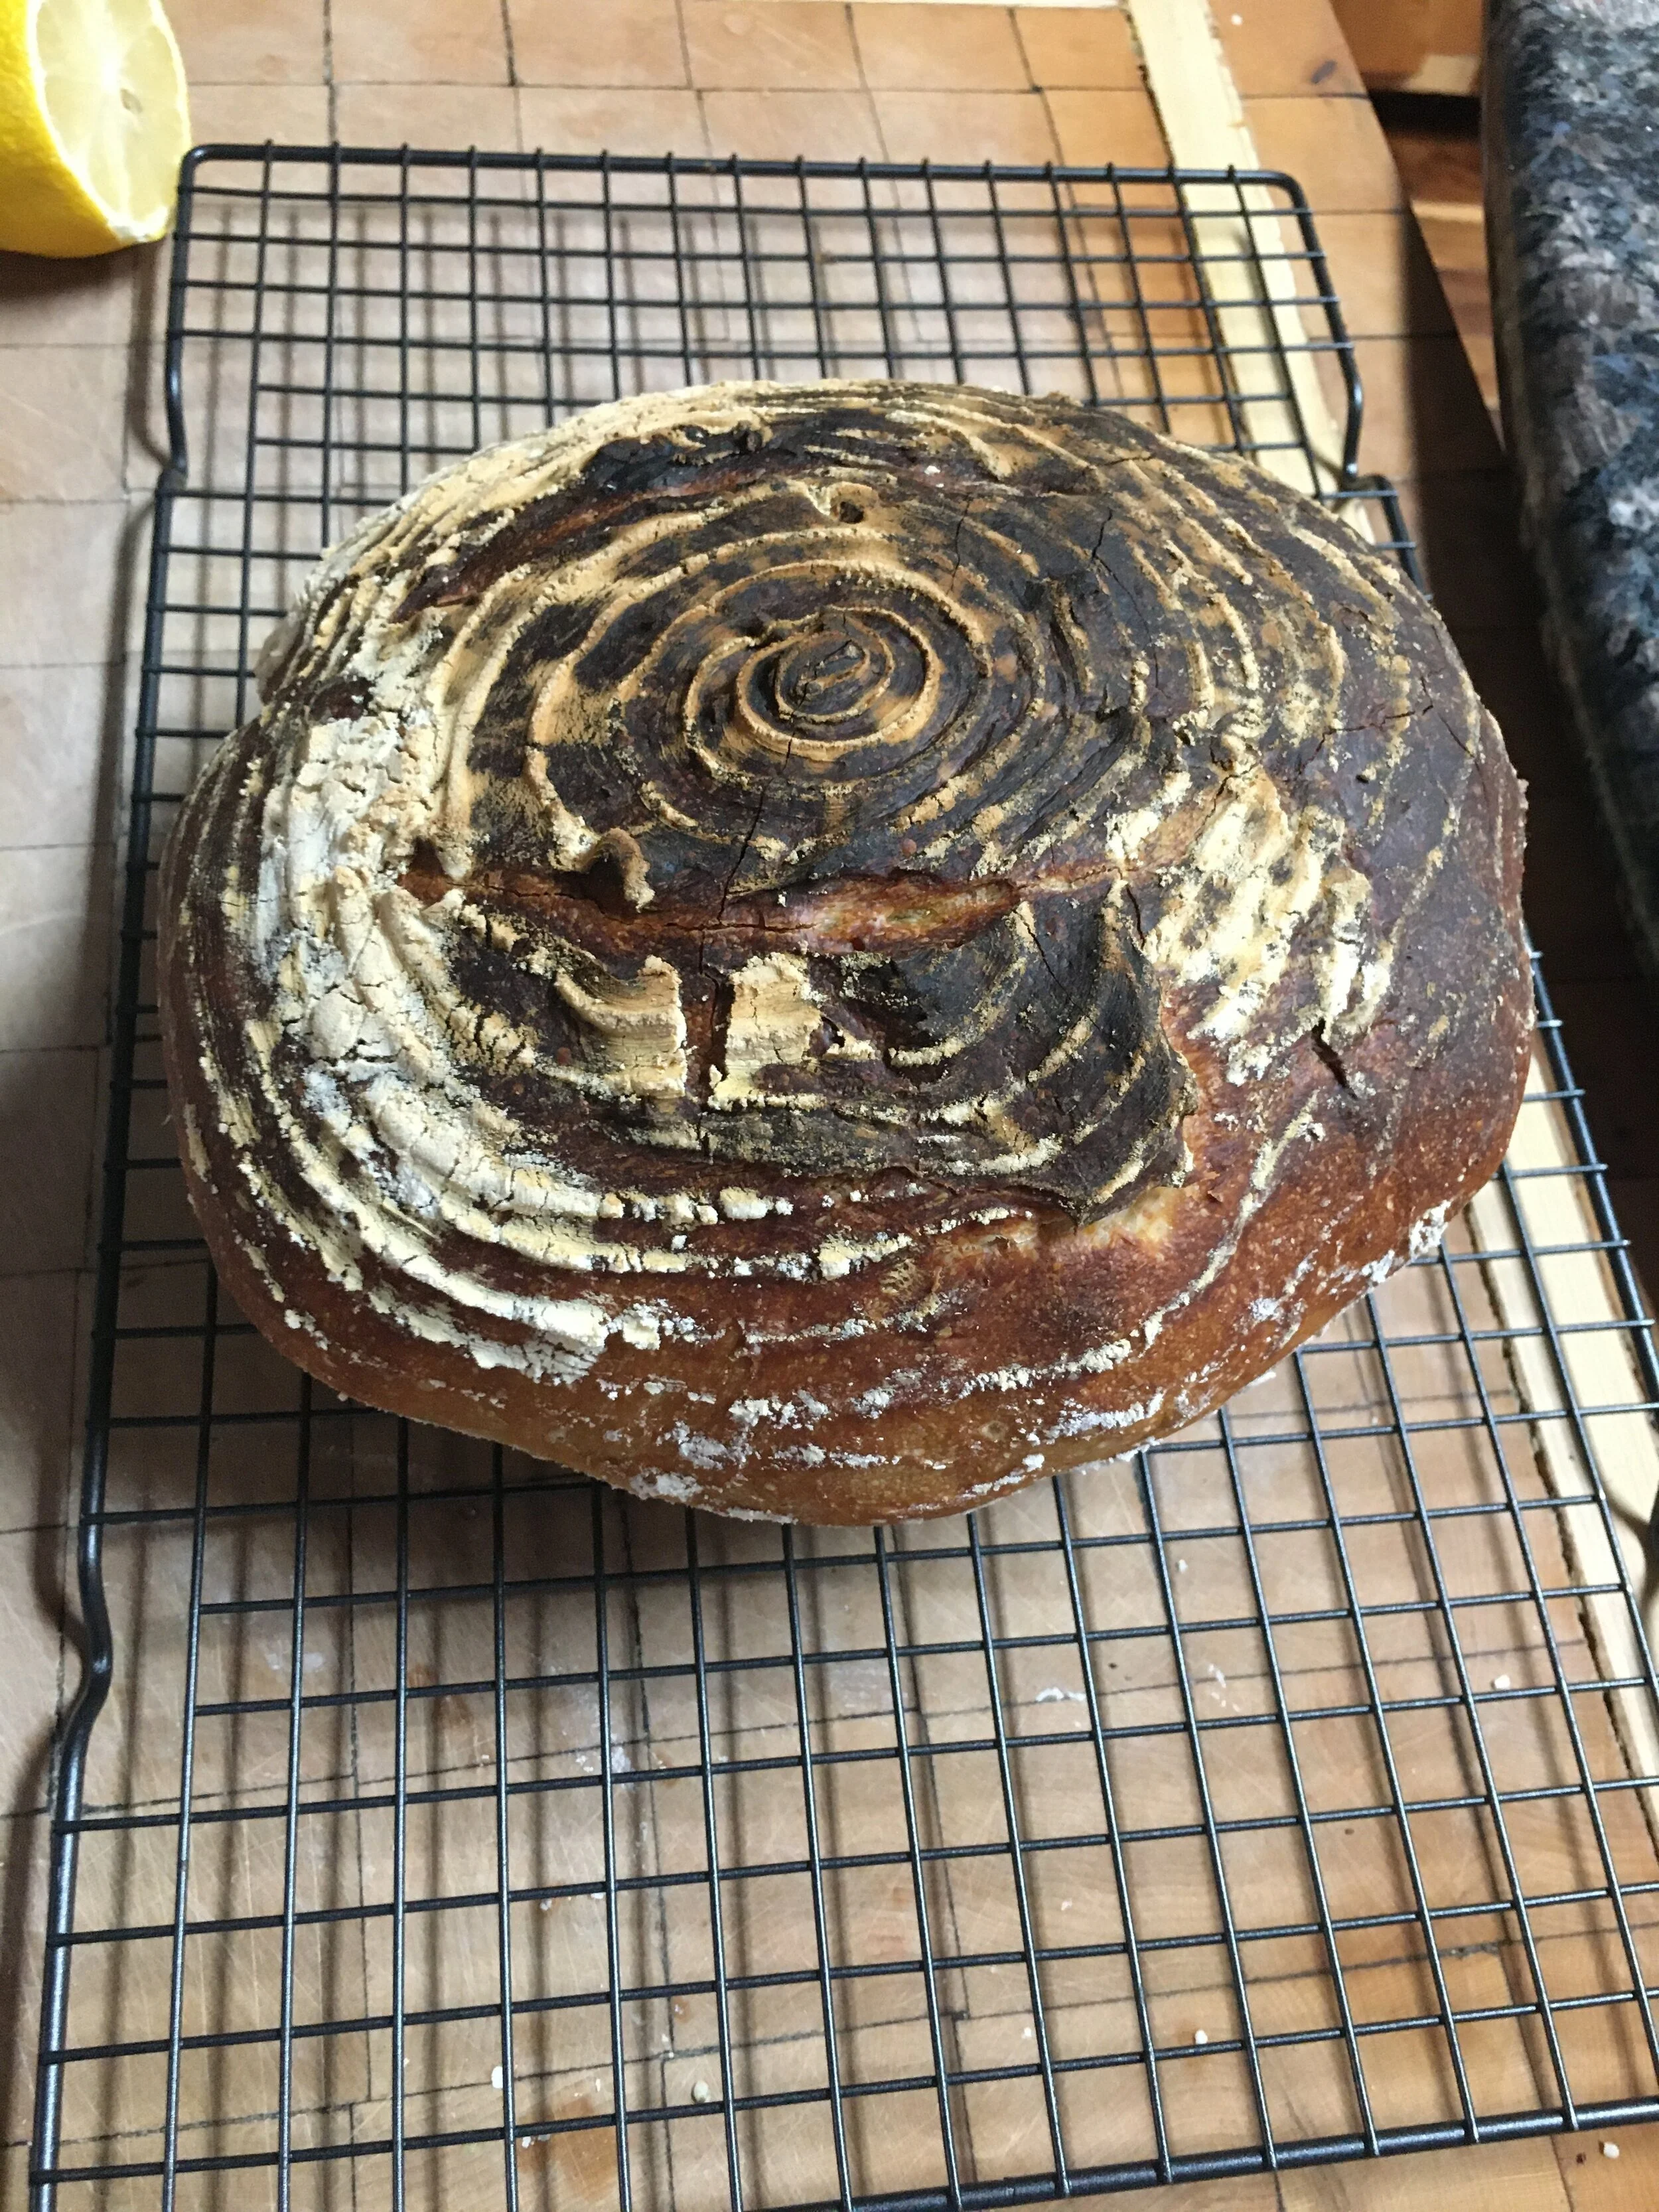
This one was burned a little on the top because it went for 30 min in the oven (I blame bathtime distractions with the toddler ;) )
To make your Sourdough Starter:
The magic of making a sourdough starter is about having enough water, your dough exposed to natural yeast in the air and time.
Take 2 cups water and 2 cups flour and mix into a mixing bowl. Cover with a towel and allow to sit for 24 hours.
For following 7 days, discard half of the dough (you can use this to make pancakes or to give to a friend) and add 1 cup flour to the starter along with enough water to keep it a soupy texture.
Your starter should become bubbly after about 4 days or so. To speed up this process, keep it near a heat source (but not directly next to it to prevent it from getting too hot and killing the yeast).
Once your starter has passed its bubbly phase, you’re safe to bake with it!
If you keep your sourdough starter at room temperature, it can eat up a lot of flour to keep it satiated so I recommend keeping it in the fridge until you’re ready to use it again.
My Timeline
Here’s what I do to get it ready for baking again:
Friday take the starter out of the fridge.
Feed it 1 cup of flour and add a little water to get it soupy.
Place about 3 feet away from a heater (it’s cold in my house so this helps).
Feed on Saturday (same as above)
Prep dough and starter for bread Sunday afternoon
Bake Monday morning.